
How Rhino Skin Lacquer (Xipi) Is Made: The Chong Series (High Relief)

The Chong (崇) Series is HFDlacquerware's (禾丰鼎) high-relief rhino skin lacquer: steep, mountain-like ridges are covered with more than 20 coats of colored lacquer, then sanded back to reveal bold, sweeping grain. Each piece passes through about 12 major stages and takes two to three years to complete.
Among China's traditional lacquerware, pieces made with the rhino skin lacquer (Xipi, 犀皮漆) technique are the rarest of all, so scarce they are sometimes described as "phoenix feathers and unicorn horns." Yet their rarity does nothing to dim their brilliance. What makes rhino skin lacquer so admired is its naturally varied, ever-shifting grain and its warm, mellow color.

As with all lacquerware, the process is long and intricate. Some say a complete rhino skin lacquer piece requires 76 separate steps from start to finish, and if every individual coat of lacquer is counted, the true number is even higher. Setting aside the repeated sub-steps within each stage and the making of the body itself, the process comes to roughly 12 major stages. For an overview of the basic steps shared by all lacquerware, see How Traditional Chinese Lacquerware Is Made.
At HFDlacquerware, every body is custom-made, whether the piece is small or large. Tea wares use hand-thrown ceramic bodies, while furniture and scholar's-studio objects are built using traditional Ming-dynasty techniques. Only once the body is complete does it move into our lacquer workshop.

Building the Foundation: Stages 1–6
The early stages of lacquerware are all about durability; the later stages are devoted to beauty.
1. Sanding the Body
Whether the body is ceramic or wood, the lacquer artisan first lightly sands the surface to smooth out fine irregularities. Any dips or unevenness are filled with lacquer putty and sanded down.

2. Applying Raw Lacquer
Once the surface is smooth, raw lacquer (生漆, sheng qi) is wiped onto it. The raw lacquer soaks into the body and strengthens the bond between lacquer and body, the first step toward a sturdy foundation.

3. Applying Lacquer Putty (Gua Hui)
After any excess raw lacquer is wiped away, the piece moves into the gua hui (挂灰) stage. Tile ash (瓦灰, wa hui) is thoroughly mixed with raw lacquer, and the putty is spread evenly over the body with a putty knife, working it into the pores. On a wooden body, this also calms the wood's natural movement, preventing it from expanding and contracting with heat and cold.
Pieces without a cloth layer receive three passes of putty: coarse ash, then medium ash, then fine ash. Pieces that will receive cloth usually get two passes first.


4. Applying Raw Lacquer Again
After each round of putty, the piece is cured, sanded, and coated again with raw lacquer. Unlike the putty, this coat is 100% pure raw lacquer, so its bonding strength is even greater. Raw lacquer is a powerful natural adhesive and plays a critical role in the piece's durability.

5. Cloth and Putty (Pi Ma Gua Hui)
Next comes pi ma gua hui (披麻挂灰): a layer of cotton or hemp cloth is applied to the surface, and putty is spread over the cloth. Each round follows the same cycle: apply cloth, apply putty, sand, apply raw lacquer. The number of rounds depends on the object. Nearly all Chong Series pieces receive cloth and putty, with only a few exceptions.

6. Applying Raw Lacquer Once More
After the cloth-and-putty stage, a final coat of raw lacquer is applied. The groundwork is now complete, much like finishing a building's foundation before construction begins above ground.

Creating the Rhino Skin Pattern: Stages 7–12
7. Building the Raised Ridges (Da Nian)
This is the heart of the rhino skin lacquer process and the stage that demands the most skill, patience, and aesthetic judgment. Egg white is mixed evenly with colored lacquer, and the mixture is built up on the surface into raised clusters called nian (埝).
For the Chong Series, the artisan builds steep, high-relief ridges with dramatic peaks and valleys. These towering forms are the embryo of the bold, sweeping grain that defines the series.

8. Layered Lacquering (Xiu Qi)
The ridges must cure completely before any lacquer goes on top. They rest in a curing room (荫房, yin fang), kept at 77–86°F (25–30°C) and 75–85% humidity, for three to six months. Then the layered lacquering (髹漆, xiu qi) begins: thin, even coats of different colored lacquers are brushed on one after another over the ridges.
Chong Series pieces receive more than 20 coats of colored lacquer, often 35 or more. The exact number is never fixed in advance, because it depends on the height of the hand-built ridges. Each coat cures for one week to half a month before the next color goes on.

The first coat of lacquer after the ridges have cured. Gold-toned lacquer is brushed over the red ridges; dozens more coats in different colors will follow, each cured for one to two weeks. 9. Coarse Sanding
Once all the coats are on, the piece is wet-sanded to cut through the buried layers and reveal the hidden colors beneath. Coarse sanding uses 350-grit and then 600-grit sandpaper, gradually bringing out the mountain-like rings.

10. Applying Clear Lacquer
After coarse sanding, a coat of clear lacquer is applied to prepare the piece for fine sanding. Coarse sanding cannot leave the surface perfectly level, and sanding any further at this point could cut straight through the pattern. The clear coat does two jobs: it levels the surface, and it adds a protective layer so the pattern is not easily sanded through during fine sanding, where the margin for error is a fraction of a millimeter.

11. Fine Sanding
Once the clear lacquer has cured, fine sanding begins: four rounds with 2000-, 3000-, 5000-, and 7000-grit sandpaper in succession. By the end, the surface is already remarkably smooth and glossy.

12. Wiping and Polishing (Kai Qing and Tui Guang)
Wiping (揩清, kai qing) and polishing (推光, tui guang) go hand in hand. A special cloth is lightly dipped in clear refined lacquer (熟漆, shu qi) and wiped across the surface, then clean cotton removes any residue. After the piece cures, it is polished with ultra-fine polishing powder.
This wiping-and-polishing cycle is repeated five to eight times. The finished piece takes on a warm, lustrous glow: a smooth surface with grain that flows like water, natural and understated, radiant with quiet depth.

Chong vs. Yi: Two Styles of Rhino Skin Lacquer
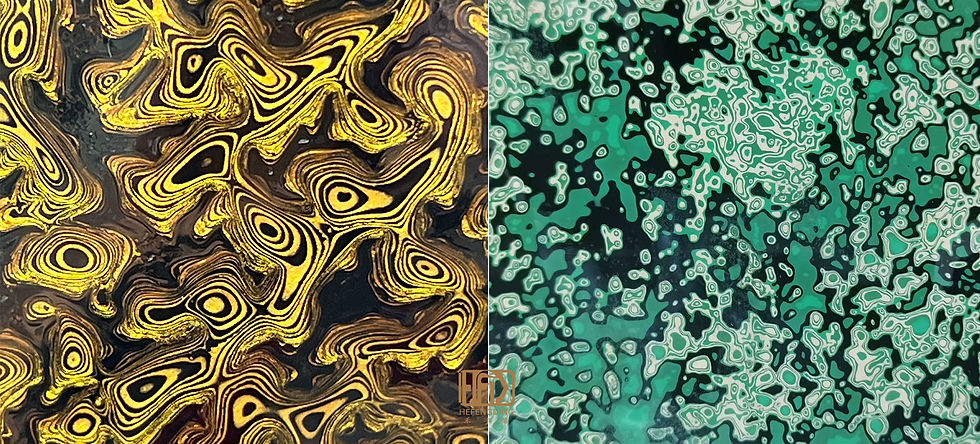
Our rhino skin lacquer comes in two series. The Chong (崇) Series celebrates bold, mountain-like high relief, while the Yi (夷) Series offers a gentler, silky low-relief look.
Chong Series (崇) | Yi Series (夷) | |
Relief | High, with steep peaks and valleys | Low and gentle |
Coats of colored lacquer | More than 20, often 35 or more | Fewer than 15 |
Texture | Bold, sweeping, mountain-like rings | Sleek, subtle, silky |
Explore both textures in our Rhino Skin Lacquer Collection.
Frequently Asked Questions
Why does a Chong Series piece take two to three years?
Most of the time goes into curing, which cannot be rushed. The high ridges alone need three to six months to cure. Then each of the more than 20 coats of colored lacquer (often 35 or more) needs one week to half a month of its own, followed by several rounds of wiping and polishing.
Is every piece's pattern unique?
Yes. The ridges are built by hand, and sanding reveals the buried colors differently on every piece, so no two Chong Series pieces are ever alike.
Can Chong Series tea wares be used every day?
Yes. Once fully cured, natural lacquer is heat-resistant and waterproof, so our tea wares can hold hot tea and hot water. Wash them with a soft cotton cloth and regular dish soap, never use steel wool, and keep them out of the microwave and the oven.
Written by Haiyan of HFDlacquerware (禾丰鼎). Based in the United States, Haiyan works with her family, who make every piece by hand in their workshop in Xianyou, Fujian.


Comments